TIPS FOR FOOD STYLING WITH OUR CO-FOUNDER KARINA
We had such a fantastic response to our interview with Lib Carter the other week that we’re running with this format again, this time with one of our own, our co-founder and resident food stylist, Karina van de Pol!
Karina has worked as a food stylist for over a decade with clients such as David Jones, Coles, Pan Macmillan and Hardie Grant. A couple of her latest projects include styling cookbooks for Karen Martini, Julia Busuttil Nishimura and Aaron Turner. You can also catch some of her latest (beautiful) work in this month’s delicious magazine. (She’s going to be furious with me for writing all of this! 😆)
Many of us (Karina and me included) have been furiously baking our way through isolation, testing and perfecting a pile of different recipes. Today we’re sharing some of Karina’s some tips and tricks on how to style up your sourdough / banana cake / anything Ostro related and make your efforts look as delicious and mouthwatering as possible. After all, if it wasn’t documented on Instagram throughout isolation then did it even really happen?! 😏
If you do need to call in the professionals for a campaign then we are always here to help with the studio, kitchen and cupboard full of props at the ready - we’d love to chat further with you anytime. We really hope you get something out of Karina’s advice, and if you do happen to whip up something wonderful this weekend be sure to tag us so that we can take a look!
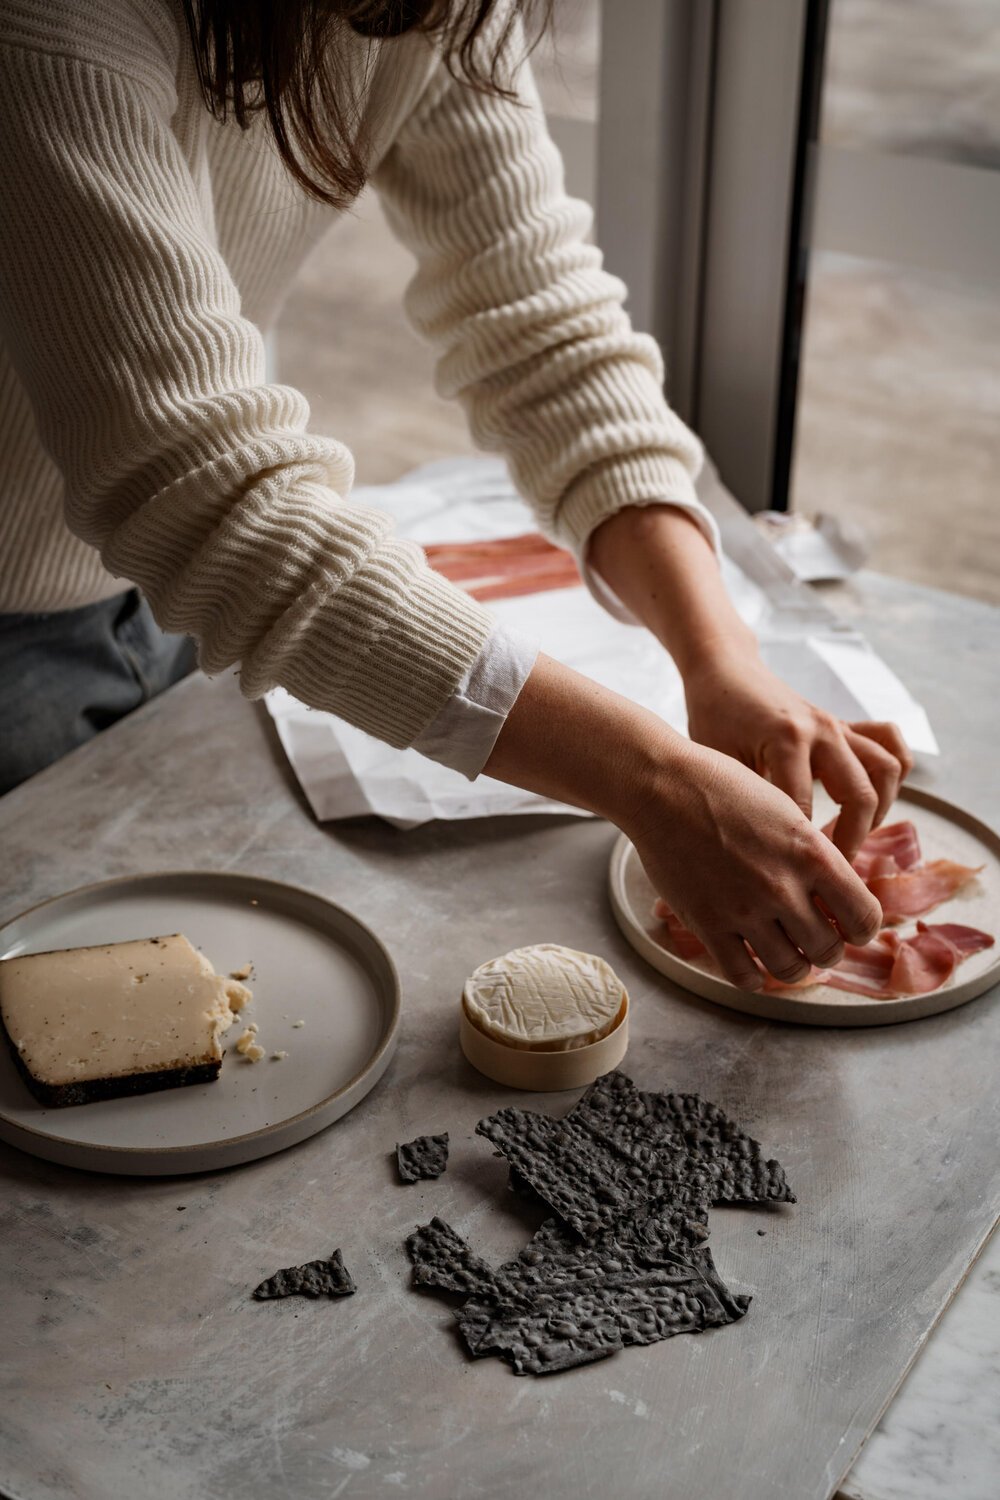
Photography Armelle Habib, styling Karina Duncan for 'Ostro' by Julia Busuttil Nishimura
Photography by Armelle Habib, styling Karina Duncan for Ostro by Julia Busuttil Nishimura
TIP #1: WHAT’S YOUR BACKGROUND?
Use backgrounds that make your food the hero of the image, you could use a piece of fabric, a coloured piece of paper or even just your kitchen table or bench. Think about adding contrast to whatever colours feature in your food or the dish you are using. Think about using a background and props that create a story around how your dish will be eaten. You can also use multiple backgrounds connecting to each other (eg a table backed up against a curtain or wall) to give you flexibility in shooting different angles (more on this later).
TIP #2: DEPTH AND TEXTURE
Creating layers adds depth and grounding to the shot. Layer the dish on a wooden board or metal tray, or introduce a linen tea towel or napkin to add some softness and textural contrast. Something as simple as adding a piece of crumpled baking paper underneath a dish can also add texture. Ensuring the viewer can also get a sense of the texture of the actual food can help to make it look appetising, you can achieve this by placing a spoonful of sauce next to the saucepan, sprinkling some salt or breaking up a biscuit to spread a few crumbs around.
TIP #3: LIGHT IT UP
Lighting is very important when trying to capture food (or anything) at its best. Placing your objects in natural light can create beautiful highlights and also add interest and depth. Shoot near a window with gentle light or even outside. Have a go at creating shadows or directing light by placing objects in between it and your subject. You can also achieve beautiful shadows or filtered light with glassware or reflective cutlery.
TIP #4: ARE YOU COMPOSED?
Plan what you want to achieve with your image, keeping in mind focus, balance and structure. Think about trying to direct the viewers eye to most important details first, then moving around to take in the whole image.
Have a play with all of the elements in your shot to see what works best. If something is visually heavier on one side of the image you may want to balance it out with another element on the other, for example a strategically placed glass or napkin.
You may have also heard of the rule of thirds. This is when you divide your shot into a 3 x 3 grid, placing the most important elements in the shot in the intersections of the grid or using these lines to help you align particular parts of your image. Again, having a play with these elements is usually the best way to work our what looks balanced and pleasing to the eye.
I also often think that odd numbers can help to achieve balance, for example three dishes placed in the shot rather than four or three cookies on a plate, rather than two.
TIP #5: CONSIDER COLOUR
Styling with neutral coloured vessels tends to work best for most foods. Think greys, creams, whites, blacks, pale blues etc. If you use a lot of colour or patterns that clash, this can often be distracting and detract from your dish. You can also use colour to reflect or enhance the season, story or mood of the image, for example a summery gelato on something light, fresh and clean and a wintery ragout matched with darker, moodier colours. If you do want to add a pattern to your story I’d advise you to ensure the rest of the elements you use are pared back and simple to ensure that the food is still the hero of the shot. Also ensure to always use matt vessels as anything with a shine can create unwanted reflections.
TIP #6: SHOW US YOUR BEST ANGLE
Most dishes have an optimal angle to shoot from. Think about the elements of the dish you want to show off and how this interest is best displayed, usually straight overheard or directly from the side (you can also shoot at an angle). For something like a pizza, beautifully dressed cheesecake or the inside of a big roasting dish an overhead angle is going to show off your dish the best. If you’re shooting something layered or tall such as a dessert in a glass, drinks or a layered cake shoot from the side or at an angle that best captures these details.
TIP #7: KEEP IT SIMPLE
People can have a tendency to overcrowd a shot, or use too many props and items. Leaving some negative space on the plate or across the background can really enhance your final image. Leaving space will enhance the details in the food you are stying and draw attention to it. Less is more.
Karina behind the scenes setting up an image, photography by Tony Evans

Utilising natural light, textured backgrounds and neutral vessels